Alas it's just impossible to do. For example in this ground floor front room, all the paint stripping has to be done at once, followed by all the sanding done at once, then filling all at once, sanding again, then repairs, priming etc. So I inevitably find myself doing 10 tasks simultaneously, like skirting, the window shutters, hinge work, plasterwork, plaster carving, molding installation etc etc. All tasks are interlinked and I often find one job can't progress until another is started, so here follows another post of works completed, with no final result!
The ground floor front room will be the dining room, with the adjoining kitchen located through the archway to the rear. The front of the room is dominated by a large six over six double sash window with shutterbox and shutters.
The shutterbox was covered with 200 years of paint, which rendered any fine detail hard to see.

Same goes for the hallway door architrave; below you can see the original Georgian green colour scheme and the various colours from over the years:

Paint stripping as ever was arduous and soul destroying, with over 30 hours involved:

Slowly but surely detail began to emerge:

Many of the shutter panels were covered in wallpaper and then painted over:


Fully stripped back:

Such a huge expanse of timber had to be stripped:


The plaster and timber molding on the inside of the archway had to be carefully stripped back. The upper section of the arch, much like the identical one upstairs, is made from plaster and is quite delicate. The lower upright sections are timber:


Some of the original molding falls off due to the heat or the tiny tacks used disintegrating. All shall be reattached later on:


Like many of the other shutters in the house, a mixture of ugly hinges had been attached over the years after the originals failed:

Like the upper floors, the window reveals are home to a library of wallpapers that have built up over the years, which will be left in situ, covered over and left for future generations to find:

I began the refurbishment work on the shutters, removing any non-original hinges, latches and various screws and metal work.


The heads of the shutters also required reinforcing:

Chiseling out sections for the new hinges, which will operate along side any remaining original ones:

The original hinge is still in-situ in the picture below, with the ungainly past repair below it:

Once the new brass hinges are fitted, the tacked on hinges are removed:


Two new brass hinges in place, two more to go:

The molding were then reattached to the shutters and the panels below the sills. Any missing or damaged sections are replaced with reproductions I had made by Inniskeen Joinery, bonded to the timber with mitre glue:

New skirting in place at the base, matching the original's height. All molding are removed in this image, about to be reattached:


Whilst the original skirting was put into storage before the floor works began, unfortunately some of it has gone missing. This is all that remained:


I was in two minds as to whether I should bother restoring it at all, but in the end I decided it would nice to have the original skirting in place and went ahead with what remained. Once again it was in awful condition:

I pretty much only had enough for the corner to the right of the fireplace and the corner in which i'm standing:


More of the original green paint:


Many of the larger boards had significant damage which required lots of filling, nail removal and sanding:


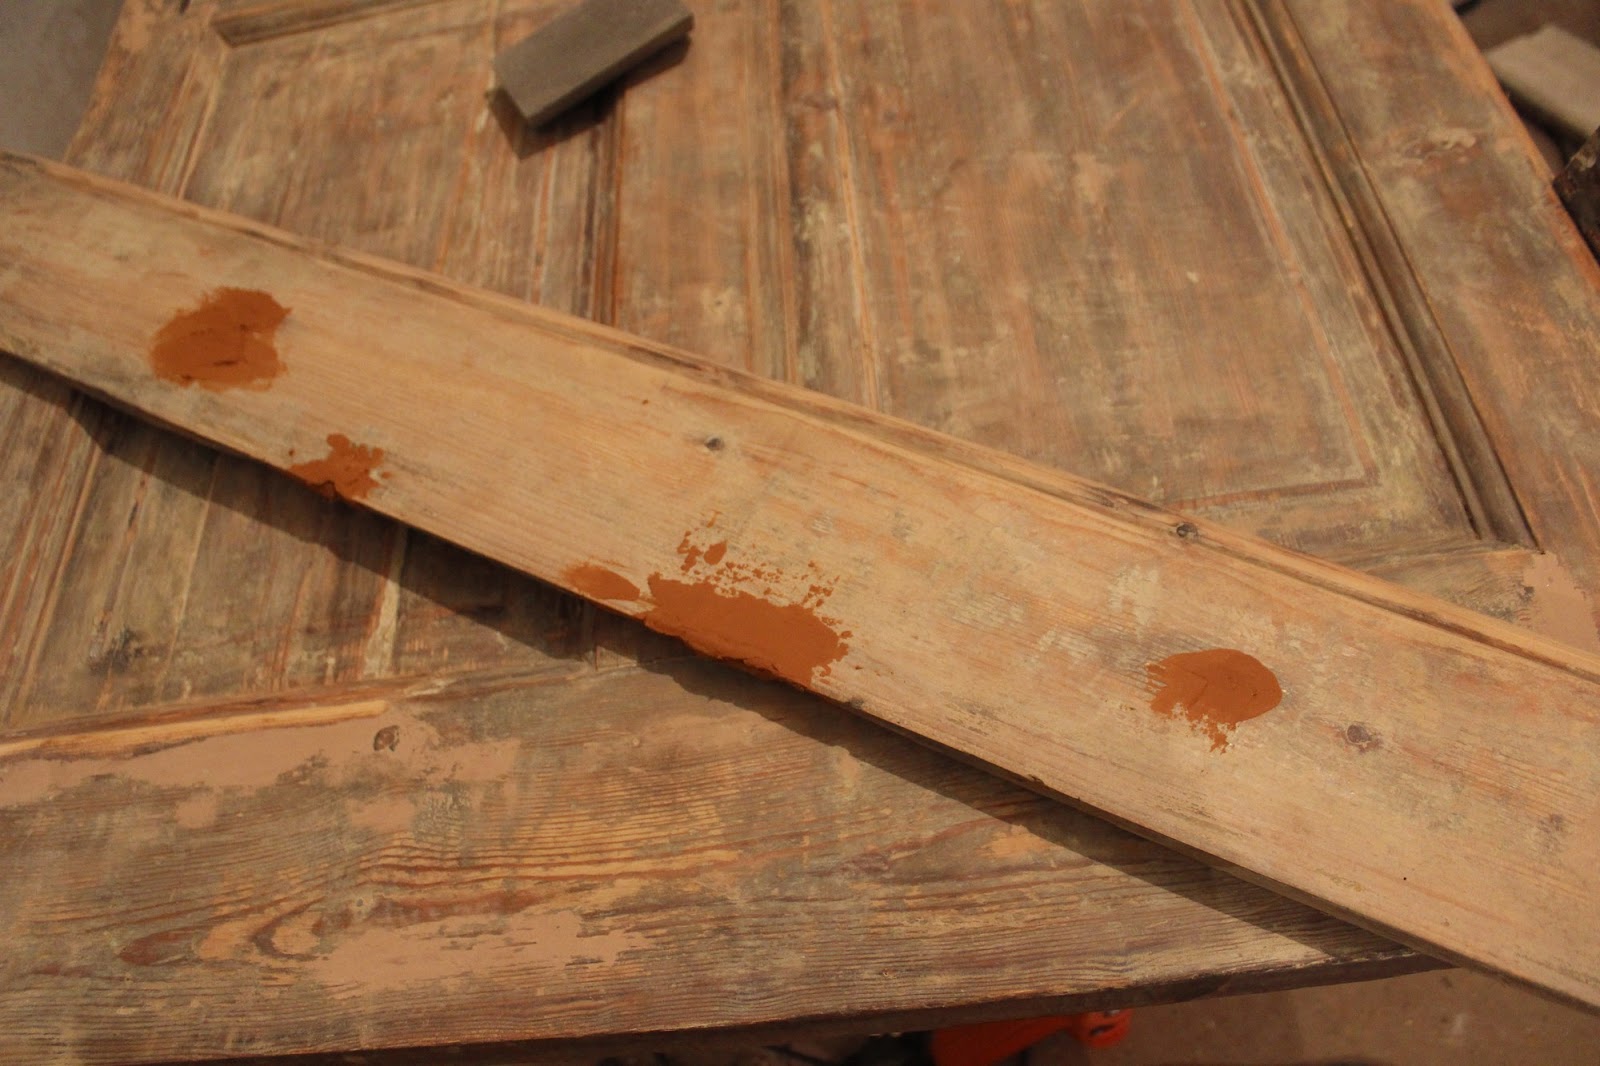

Filled and sanded:


These are the original plinths that sat below the archway. Because the floor level is now approx 1 inch higher than before, the vertical sections of timber had to be cut shorter:

...and space needed to be made for the plinths to fit back in their original positions, as the walls have since been re-plastered:


The walls being plugged so the skirting has a firm fixing:


More filling and sanding:


This board was in particularly bad condition:


The plinths had lost so much detail and needed to be stripped, filled and sanded:


At this point I had run out of original skirting. Paul Dowdall Joinery cut me some new skirting, with my special bit that is a perfect replica of the original skirting's bullnose:


Coping is tedious but has to be done:


Fitting the last original board to the new board:


A perfect fit:


All screw holes filled:


The large gaping holes in the wall were filled with a lime plaster mix and will be skimmed this week:


Painting is due to be started this coming week.
I'm a long time reader of your blog. We're also renovating a Georgian house and find your blog posts SO encouraging and inspiring and motivating and exciting... including the fact that you totally understandably sometimes have to show half-finished projects.
ReplyDeleteThank you so much for taking the time to share your exciting journey! I love it!
Best wishes, Sarah
Thanks so much, that means a lot!
DeleteI am utterly stunned by what you have managed to accomplish. Like Sarah I have been following your blog for quite some time. I very much appreciate your detailed photographs that illuminate the entire process. I don't know that I'd ever have the patience or stamina to tackle a job of this enormity, but I can certainly applaud when I see someone else committed to this level of thoroughness. Well done!
ReplyDeleteAlways great to hear people are actually reading and enjoying the blog, keeps my spirits up, thank you!
DeleteI was looking for this kind of information that I received from here..
ReplyDeleteSquee!!!!!!!!
ReplyDeleteA new post!
I don't care if you upload ideal AFTER posts or INTERIM posts. Whatever you wish to post is just fine with me.
Your dedication to DIR (doing it right) is tremendously inspiring. I just love what you have accomplished, and love that you are willing to take the time and share with people across the globe.
I offer you a virtual hug from Kansas, USA.
Ross has a blog too and a reader contibuted tips on his manner of paint removal. This is Stewart McLean's complete post on 18 November 2017.
DeleteHere is something that I just posted on Old House Dreams and am posting it here because it might be of interest to you and/or your avid followers.Here’s hoping that this is useful to as many people as possible.
Hi Ross and Fellow RestoringRoss Followers,
I am writing about an accidental discovery in removing paint. I am hoping that one of you has a similar paint stripping need and will try this method and see if it works for you. I am rehabbing an 1888 house which was carpeted throughout. Under the carpet was linoleum tiles with no underlayment. When I scraped up the tiles, the floors were painted underneath.
When I am cleaning, I routinely cover whatever cleaner or solution that I am using with black plastic. I use contractor grade bags and cut out the bottom and one side, apply cleaner to an area that size, and cover it with the plastic. Then I go away for anywhere between an hour to a day or more. I find that as long as the chemical is wet, it continues to work.
I was trying to clean a test area of my floors of about a square foot. I used the purple cleaner and degreaser which is sold at the local big box hardware store. I poured a little on the floor corner and spread it with my nitrile glove encased hands. Then I covered it. The next day when I uncovered it, I noticed that the pint had partially dissolved too. I poured a little fresh cleaner on top and scrubbed with my gloved hands. I also used a stiff brush that does not have metal bristles so as to avoid putting scratches in the wood.
After wiping up with paper towels, the floors were nearly down to the wood. A spot cleaning with the cleaned brush and more of the concentrated cleaner took the rest of the paint out.
I discovered this several months ago and have been stripping my floors in sections since then. It does raise the grain, but that is easily hand sanded off.
Today I decided to try it on something else. I have a brick walled room which was formerly on the exterior of my 1820 Federal house. I have tried without success to remove heavy gray paint with a citrus based stripper. I wanted to hang a tankless water heater to the wall, but I didn’t want the paint behind the heater. Using a cheap pump garden sprayer, I soaked the wall with the purple cleaner. I sprayed the cleaner on several times during the day to keep the wall damp. I took an old screwdriver and scraped out about ¼” of the mortar between the brick with ease. Then I scraped the brick surface with a metal putty knife. For the next step, I used the scrub brush and rinsed with more chemical. I now have exposed red brick.
This stuff costs about $35 for a five-gallon container. I already had the sprayer, scraper, and scrub brush. I have now been spraying the entire wall every hour or so to let the cleaner work through the paint and into the brick. Are any of you out there willing to give this a try on an out of the way test area on your house and report back to me as to what works for you and what doesn’t.
Thanks for the replies guys.
DeleteThe paint stripping method you use is an interesting one. Not sure what would be the equivalent kind of cleaner on this side of the water.
I have to say though, if you have multiple layers of paint like I do (5+ layers), nothing is more effective than a heat gun.
No doubt chemicals/cleaners are a breeze with one or two thin layers, but the stuff in my house is welded to the timber.
Yes there are some scorch marks, but i'm not leaving any of my timber exposed, it will all be painted. This window shutter was also pretty much the last thing to be stripped in the entire house (thank god!).
Thanks again for all your comments, love reading other people's tips and tricks!
Stephen
Leigh copied one of my posts on Restoringross.com about an accidental paint removal discovery that I made. Since it is still experimental and i have only just shared it, I don't know how successful others will be with it. Stephen, If you try it on your vertical trim, I would recommend That you put on your nitrile gloves, soak paper towels or rags in the purple cleaner, and apply it that way. Then put the heavy plastic over it so that it does not dry out. When you try a test area and after pulling away some of the towels, discover that it seems to be working, but hasn't penetrated to the wood, Don's waste the cleaner on the towels. If you spray more cleaner on top without taking the towels down off of the surface that you are stripping, you won't need to start over. My theory is that the chemicals continue to work as long as they are wet. The plastic keeps them from drying out, but does not make rewetting unnecessary because the cleaner can dry by being absorbed into the old paint. Hope this is helpful to you. The signs that you are using a heat gun make me very nervous and it seems from the pictures to be scorching the wood.
ReplyDeleteThis comment has been removed by a blog administrator.
ReplyDeletewow what an incredibly tedious work! congrats!!
ReplyDeleteThis comment has been removed by a blog administrator.
ReplyDeleteThis comment has been removed by a blog administrator.
ReplyDeleteThanks you for sharing this unique useful information content with us. Really awesome work. keep on blogging
ReplyDeleteHouse Refurbishments in Clapham